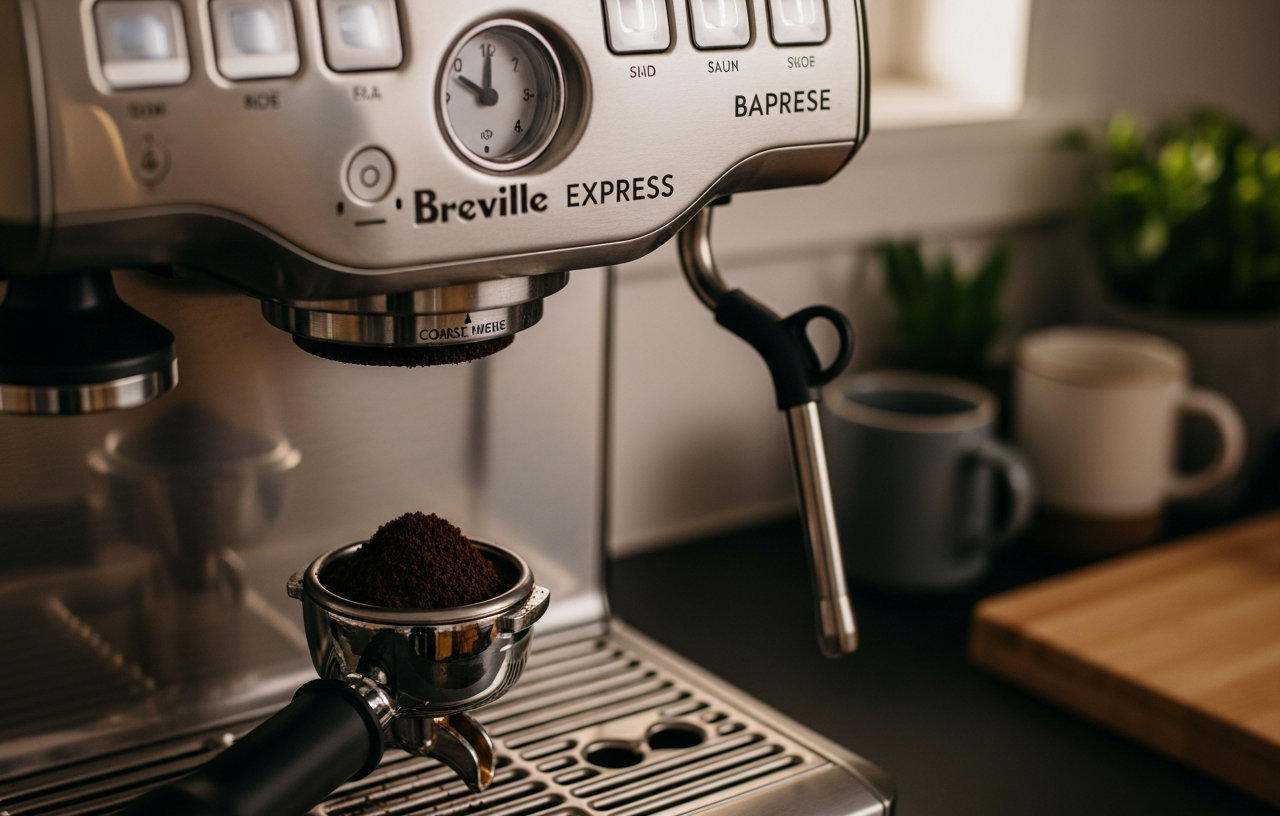
Achieving the correct grind size for espresso is critical. When your Breville Barista Express produces coarse coffee, it directly impacts extraction and flavor. A grind that is too coarse allows water to pass through the coffee puck too quickly, resulting in under-extracted shots that taste sour, weak, or watery. This issue is common for new users and experienced home baristas alike. Understanding the grinder's mechanics and common points of failure can help you troubleshoot and resolve the problem, ensuring you consistently pull delicious espresso.
The Breville Barista Express features an integrated conical burr grinder. This system is designed for convenience, but it also means that any grinding issues directly affect your espresso quality. Diagnosing a coarse grind requires a systematic approach, starting with the most common and easily adjustable factors before moving to more involved maintenance or repairs. The machine features a grind size selector dial on the side, typically numbered from 1 (finest) to 16 (coarsest). Many users start with a factory default or a setting that worked for a previous batch of beans, only to find their current coffee requires a different approach.
Freshly roasted coffee beans, roast level, and bean origin all influence the ideal grind setting. Darker roasts are often more brittle and may require a slightly coarser grind than lighter roasts. Conversely, very fresh beans might need a finer grind as they contain more gas and are denser. Your goal is to find the setting that produces a shot of espresso in 25-30 seconds, yielding about 1 to 2 ounces of liquid (30-60ml) from a double shot.
To adjust the external grind setting, make sure the grinder is running. Adjusting the grind while the burrs are static can put undue stress on the motor and burrs, potentially causing damage. Turn the grind size dial incrementally towards a finer setting (lower numbers). After each adjustment, grind a small amount of coffee, brew a shot, and taste the results. This iterative process helps you dial in the perfect grind. Remember that even a single click can make a noticeable difference in extraction time and flavor.
Incorrect Internal Burr Setting
Beyond the external grind dial, the Breville Barista Express also has an internal burr adjustment. This feature provides an additional layer of fine-tuning, especially useful if you find that even the finest external setting (1) is still producing overly coarse coffee. The internal burr setting is less frequently adjusted, but it is a critical tool for achieving espresso-level fineness, particularly with very light roasts or specific bean types.
To access the internal burr adjustment, first remove the bean hopper. Then, carefully remove the top burr. The top burr usually has a handle or a wire bail to lift it out. Once removed, you will see a numbered ring on the lower part of the top burr. This ring indicates the internal grind setting, typically ranging from 1 to 10. A lower number here means a finer grind. Use the metal handle or a small tool to rotate this ring to a lower number. For espresso, many users find success with settings between 2 and 4.
Reassemble the burr and hopper, then test the grind. Adjusting the internal burr setting is a more permanent change than the external dial, so only change it if the external settings are insufficient. If you find your machine struggles to grind fine enough even on external setting 1, adjusting the internal burr is the next logical step. This adjustment can significantly impact the range of fineness available to you.
Clogged Grinder or Burrs
Over time, coffee oils and fine grinds can accumulate within the grinder mechanism. This buildup, especially with oily dark roasts, can clog the burrs and grinding chute. A clogged grinder cannot process beans effectively, leading to inconsistent grind sizes, reduced output, and often, an inability to grind fine enough. The motor may also sound strained.
Regular cleaning is essential to prevent this. For a thorough cleaning:
- Empty the Hopper: Remove all coffee beans from the hopper.
- Remove the Top Burr: Lift out the top burr as described for internal adjustment.
- Brush Clean: Use a stiff brush (often provided with the machine) to clean both the top and bottom burrs. Pay close attention to the teeth and grooves where coffee particles might be stuck.
- Clear the Chute: Use a pipe cleaner or a small, non-abrasive tool to clear any blockages in the grind chute, which is the path coffee takes from the burrs to the portafilter cradle.
- Vacuum (Optional): A small vacuum cleaner can help remove stubborn fines without damaging components.
- Run Grinder Empty: After reassembling, run the grinder for a few seconds empty to dislodge any remaining loose particles.
Performing this cleaning weekly, or at least bi-weekly depending on usage and bean type, will significantly extend the life of your grinder and maintain grind consistency. Ignoring this maintenance can lead to frustratingly coarse grinds and potentially costly repairs. A professional grinder cleaning service might cost $50-$100, but it is usually a simple task you can do yourself.
Worn Grinder Burrs
Grinder burrs, whether conical or flat, are precision cutting tools. Over time and with consistent use, these burrs will dull. Dulling burrs lose their sharp edges, becoming less efficient at cutting coffee beans into uniform particles. Instead, they tend to crush or smash the beans, resulting in a higher proportion of coarse particles and fines, rather than the consistent, fine grind required for espresso.
The lifespan of burrs depends on usage frequency, the type of coffee ground (darker roasts are softer, lighter roasts are harder), and whether any foreign objects (like small stones sometimes found in coffee beans) have entered the grinder. Typically, a home espresso machine's burrs might last 3-5 years before needing replacement. Signs of worn burrs include:
- A noticeable increase in the required grind fineness setting for the same coffee.
- Inconsistent grind size, even at fine settings.
- Increased noise from the grinder.
- A weak, watery, or sour espresso shot despite correct brewing technique.
If you suspect worn burrs, inspect them closely. Sharp burrs have distinct, crisp edges. Dull burrs appear rounded or flattened. Breville offers replacement burr sets for the Barista Express. A new set of burrs typically costs between $40-$70. If you are not comfortable replacing them, a service technician can do it, but the labor cost might add another $50-$100, making it a $90-$170 repair. Given the cost, many users opt for DIY replacement.
Bean Quality and Freshness
The quality and freshness of your coffee beans play a significant role in grind consistency and the ability to achieve a fine espresso grind. Stale coffee beans are often drier and more brittle than fresh beans. When ground, stale beans tend to produce a less consistent particle size, often with more fines and coarse fragments. This makes it challenging to achieve the necessary resistance for proper espresso extraction, even with the finest grind settings on your machine.
Look for coffee beans roasted within the last 2-3 weeks. Store them in an airtight container away from light and heat. Avoid buying pre-ground coffee for espresso, as it stales rapidly. If you are using very old beans, or beans that have been improperly stored, they may simply not be capable of producing an adequate espresso grind, regardless of your machine settings. Experimenting with different, freshly roasted beans can often resolve perceived grinding issues without any mechanical intervention. Some very light, dense roasts can also be harder for grinders to break down uniformly, sometimes requiring the internal burr adjustment to be set to a finer number.
Motor or Grinder Mechanism Issues
While less common than the other issues, problems with the grinder's motor or internal mechanism can also lead to coarse grinding or a complete failure to grind. This could include a failing motor, a damaged drive shaft, or issues with the gears that power the burrs. These problems are usually accompanied by unusual noises, such as grinding, clicking, or a complete lack of motor function.
Diagnosing these internal mechanical failures typically requires disassembling the machine, which can be complex and may void your warranty if done incorrectly. If you suspect a motor or mechanism issue, and the machine is still under warranty, contact Breville customer support. For machines out of warranty, consider the cost of repair versus replacement. A motor replacement could cost $150-$300 or more, including labor. For an older machine, this might approach the cost of a new entry-level espresso machine. For example, Top Espresso Machines Under $300 for Beginners can be a viable alternative to costly repairs.
If the repair cost exceeds half the price of a new machine (Breville Barista Express typically retails for $700-$800), it might be more economical to invest in a new machine. Professional repair technicians specializing in espresso machines can provide a quote for such repairs. Make sure you get an estimate before authorizing any work.